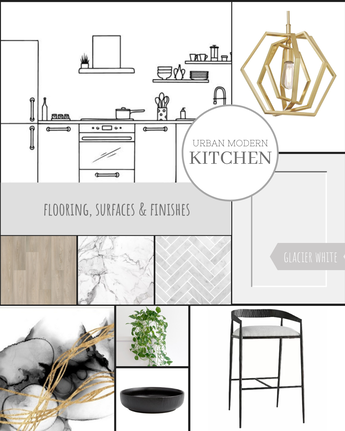
The actual numbers are quite geo-specific. In many areas, a $20k budget can get you a nice kitchen facelift: Items like painting your existing kitchen cabinets, new counters, new backsplash, new lighting, new hardware, and maybe some minor construction work. That's assuming you aren't paying a general contractor or a designer. The cost of a full kitchen gut really depends on where you live. In the US, the low average end of the range is about $40k with the high end of the range hitting $150k or more. In terms of time, a minor kitchen facelift can be done in as little as two weeks if everything runs smoothly, provided you've selected all of your finishes already and have scheduled every contractor back-to-back. A full kitchen remodel can easily take as long as a few months or longer. This time frame may not even include the design and planning phases. Sometimes, it can take a while to find the perfect countertop or research the appliances you want, and sometimes the items may be out of stock, or have long lead times, so plan appropriately and don't rush the process.  It’s important to spend on the areas that matter most. If you were our client, this is where we would tell you to invest in: Countertops: Functionally, your countertops can take a beating on a regular basis. You want something that will hold up and look great for years to come. Aesthetically they’re one of the first things people notice when they walk into a kitchen. If you ever sell your home, high quality countertops are always desirable. Cabinetry: If replacing, our advice is to go with a mid-range cabinet box and door. Splurge on soft closed hinges and glides, and full extension drawer slides: Once considered a luxury, they are becoming more common and a great selling point. If your cabinets are in decent shape or you can’t replace them at the moment, consider refacing, re-staining or repainting them. Hardware: You’ll be touching your cabinetry hardware every single day, so go for decent quality. Hardware reinforces whatever style you're going for and makes a difference in the final look of your overall design. Faucet: There's a big difference between the most affordable and the most expensive options, at least from a quality standpoint. Go for mid-range with a stainless-steel body, ceramic disc valve, magnetic spray, pull down design, and reliable, touchless on and off capabilities (a function that is fantastic to have in the kitchen). Lighting: Under cabinet lighting not only serves an important function as additional task lighting for your countertop, it also provides a beautiful ambiance to a kitchen. If you have an island or a breakfast nook, take the opportunity to select statement lighting for the area that reinforces your kitchen style. Quality cooktop or range: Unlike the oven, which typically gets used infrequently by most homes, a cooktop is often the true workhorse of the kitchen, and is typically one of the longest lasting appliances as well. And finally, an honorable mention goes to the sink: While you can save a lot of money and get a decent quality stainless steel sink, sometimes a sink really does make the design, such as a farmhouse sink in farmhouse, English country, French country, modern French, and cottage kitchens. Replacing the sink down the road is quite difficult, so better to spend on a quality sink upfront. All these areas carry a big design impact. Many of them have a great ROI and more importantly, will make you love your kitchen even more, whether it's cooking, entertaining, or whichever activities you enjoy doing in your kitchen. Final word: If remodeling is not in the cards for your kitchen in the near future, consider a time and cost effective kitchen refresh, which can be done in a short amount of time and at a relatively small investment. Many parts of a kitchen refresh can be DIYed. If you need some friendly advice or a nudge in the right direction to get you started on your kitchen transformation, contact us for one of our design & décor services and consultations.
0 Comments
So excited to kick off this new blog series called “Shop the Designer Style”. Here we'll provide a peek into some of our favorite projects and the inspiration behind them. We'll share tidbits about the people these rooms were designed for, and best of all, our designer sources to buy curated looks for your own space. We'll also share our favorite designer finds such as statement pieces, furniture, art, accessories and décor to help you style your home like a pro. 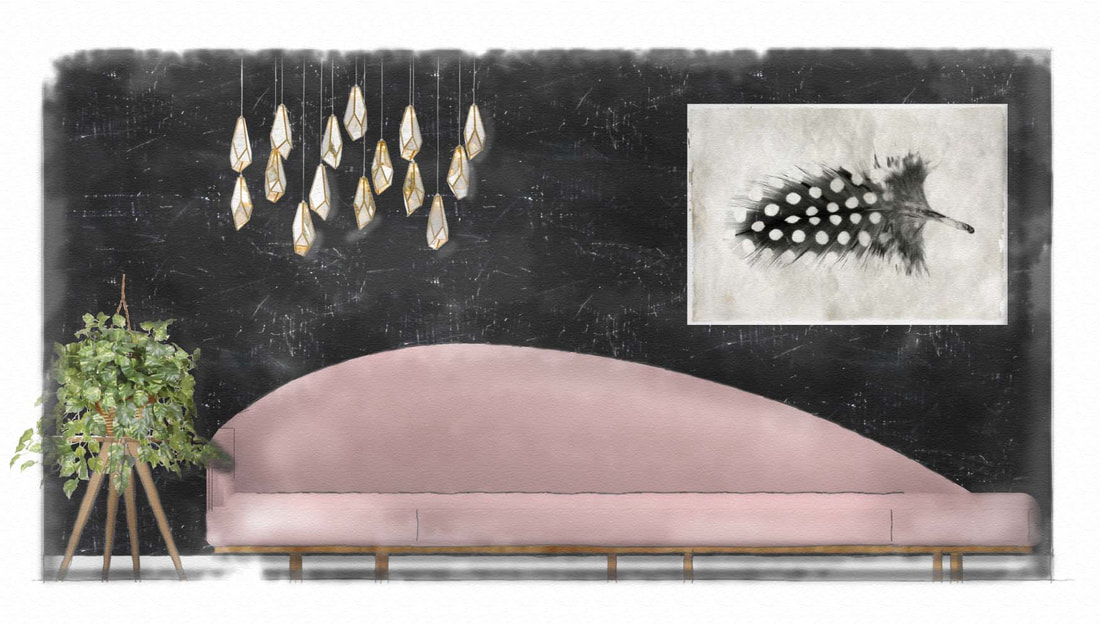 Ive & Co. Interiors, Femme Fatale project elevation illustration The idea for the color scheme for this SoHo living room design, came up while strolling the cherry blossoms in Central Park, on a trip to New York City this spring. So lucky to have witnessed this fleeting splendor on an impromptu visit! Vanessa is a French expat who has lived in Manhattan since the early 2000's. She is 38 and works for a large international bank. She has a small dog named Fifi, and just bought a loft in SoHo. Her career is very important to her, but she’s dating, and her new priority is to find “the one”. She reads French Vogue and Elle Décor and loves visiting the glamourous showrooms in the New York Design Center, on 200 Lex. She reached out to us for help decorating her new apartment, not because she lacks a sense of style, but because between work, dating and Fifi, she simply doesn’t have the time. She's the type of person who values their time over the cost, and has worked hard for that privilege.
The reason we are sharing so many details about Vanessa's life is because our approach to designing people’s homes is custom tailored and bespoke. It's important for us to get to know the people we design for, so we can create a space that reflects their true personality and the things that are important to them. 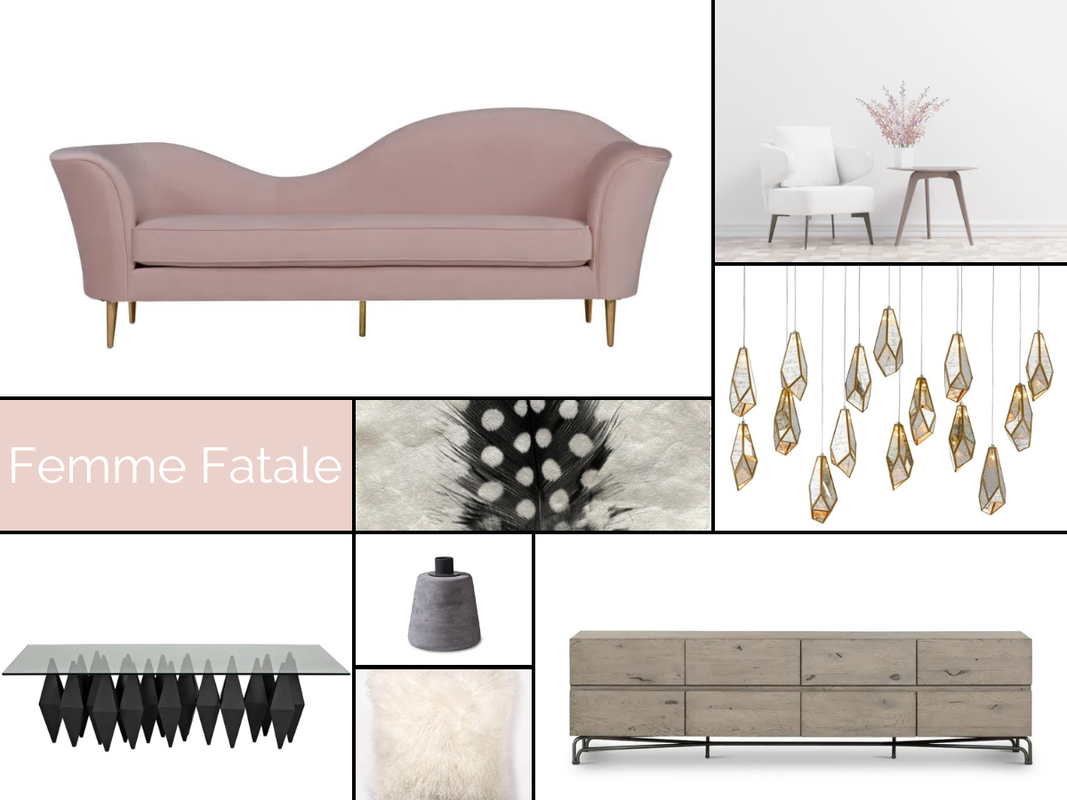 Ive & Co. Interiors, Femme Fatale project mood board. We chose to go with a clean and minimal aesthetic, punctuated with mid-century styling and Scandinavian influences to create a contemporary living space. Soft and plush throw pillows and a curvy blush statement sofa with gold legs and luxurious upholstery, for a glam feminine vibe. The atmosphere is feminine and seductive, reminiscent of the movie ‘Basic Instinct’. The mood is created through juxtaposition of contrasting elements, balanced by a touch of raw masculinity. Color, texture and pattern are injected via rugs, decorative accessories and modern art. In our furniture and décor choices, we also included a white contemporary recliner with clean lines in a calming palette to soften the mood, bringing an instant sense of relaxation. A glass coffee table with jagged legs reiterates the 'Basic Instinct' vibe of the light fixture. Lots of plants to reinforce a connection to nature and contrasting shapes, textures and colors to add to the seductive atmosphere. It was important for us not to go overboard with the ‘Basic Instinct’ theme, as to not completely scare off potential mates, so we brought in an earthy and masculine console in natural washed wood color to offset the femme fatale vibe, and added raw earthy tones to insert some masculinity throughout the space, including black wallpaper juxtaposed against the blush velvet sofa. 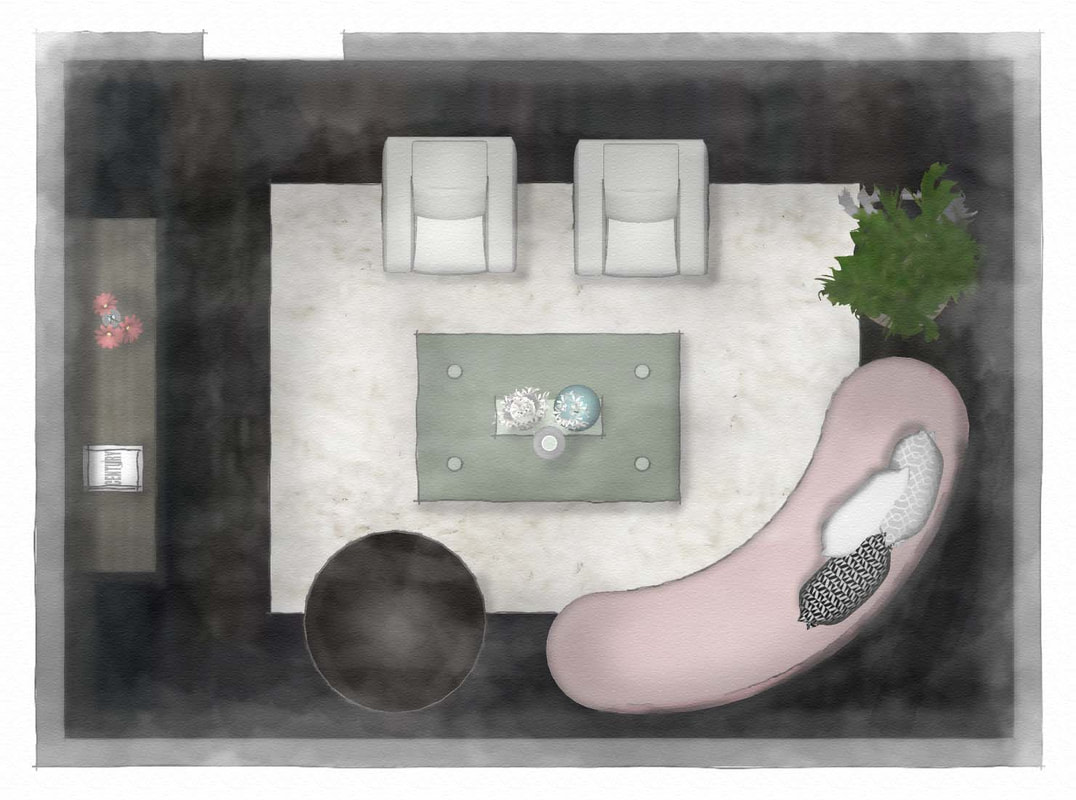 Ive & Co. Interiors, Femme Fatale project floor plan illustration. Additional elements we included in the room such as these pieces can be found in our online Designer Boutique.
Do you have any thoughts on our process, the design of this room, the color scheme or the art and décor choices? Let us know in the comments below! Contact us if you are interested in any of our design services and don't forget to like and share this post if you enjoyed it ♡.
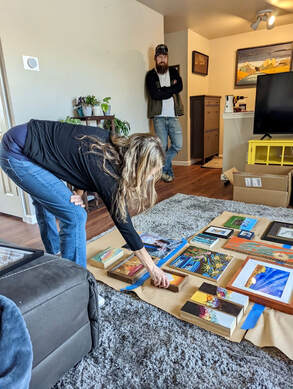
Creating an eclectic gallery wall doesn’t have to be a complicated or daunting task. It’s a fun, yet sophisticated and inexpensive way to add a sense of style and character to any room. 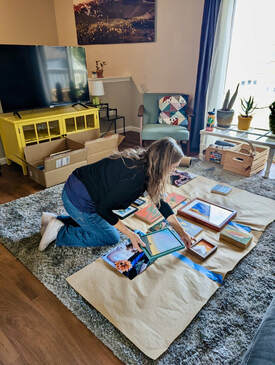 1. Start by gathering everything you think you may want to include on that wall. You can include art you've collected over the years, posters, concert tickets, family photos, diplomas and other mementos. 2. Frame any items that require framing, like concert tickets. Don’t worry if you have an unframed painting on canvas or frames that don’t match, that’s part of the fun! 3. Measure your gallery wall space and create an identical brown or newspaper version. Don't forget to make it the same shape and size as your wall area. Lay it flat on the floor.  4. Start filling in your paper model with items you gathered in step 1. Shuffle things around until you achieve a design you are happy with. Think Tetris. Be playful and have fun! 5. Once you have your gallery wall layout, trace around each item and take plenty of photos. We are creating in essence, a map of where every piece goes. 6. Transfer and tape your paper model to the wall. Add nails top and center of each trace before removing the paper. 7. Look at the photos you took in step 5 and fill in the blanks. Et voila! You’ve created a professional looking gallery wall in 7 easy steps. 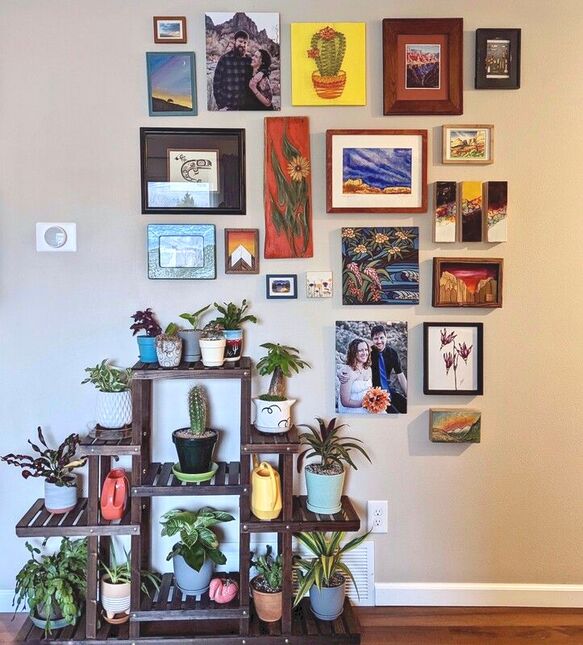 |
Author
|